HOW TO APPLY LIPSTICK TO THIN OR NARROW LIPS ?


Bonjour / Hello !!

Welcome back ! Can you believe it’s New Years Eve ? Who’s excited ? The end of the year is upon us and, here at FLAWLESS BEAUTY BLOG BY NAKIBA we’re all about saying goodbye to one year and hello to the next !


 Alors, this week’s topic is all about how to apply lipstick to thin or narrow lips…

Not all women were born with luscious lips. There is hope, however, for women with thinner lips who just want to make them look a little fuller, with the right lipstick colour and the right technique, your thin lips will look sexy and fuller in no time.

Prior to applying makeup to your lips, it is important to distinguish what form and shade suits you best. The first thing you must consider when choosing a colour is the tone you have selected for the eye makeup and the blush for the cheeks. Then you must differentiate between the three types of lipsticks. Matte, pearly and translucent. If you want to know, keep reading the article on how to apply lipstick to thin lips.


CONTENTS

  1. WHICH COLOUR LIPSTICK SUITS ME ?
  2. STEPS ON HOW TO APPLY LIPSTICK TO YOUR LIP
  3. TIPS
  4. CONCLUSION


WHICH COLOUR LIPSTICK SUITS ME ?

First, you should know that matte lipsticks are very thick tones. They are to make up fuller fleshy lips. Usually these are used in the night as they give an elegant and sophisticated effect. Lipstick in pearly colours are used to add volume to thin lips. They are for all ages and situations, bringing a touch of brightness. Finally, there are translucent lip products that give wet effect that add shine to lips whilst maintaining the natural tone.

For thin or narrow lips, it is vital you overdraw them. You must choose a warm tone that is quite vivid and noticeable. Although you must go over natural lip contour, make sure to do it to not change their natural shape too much – otherwise it will look very fake. Shimmery and frosty lip formulas work well on thinner and flatter lips as it adds a fuller and plumping effect. Ombre lip effect works very well too. If Ombre lips sounds too daunting, you can add the same colour all over your lips but add a shimmery highlight to the center of your lips for a plumping effect.


HOW TO CHOOSE THE RIGHT LIPSTICK COLOUR FOR YOUR SKIN TONE

This is a tough one, I know. I mean there are tons of marvelous lip colours out there, and we want to grab them all, right ? But if you have thin lips you cannot go for a colour that’s dark and murky.

To make lips look plumper, you need to brighten them up and lighten them up !

COLOURS TO PICK: Peach, nude, pink, pale pink and light beige.

COLOURS TO DUCK: Shades of brown, oxblood, marron, plum, and red.


STEPS ON HOW TO APPLY LIPSTICK TO YOUR LIPS


STEP 1

BEGIN WITH CHOOSING YOUR LIP LINER AND LIPSTICK

Choose a lip liner and a lipstick that match in colour.

instasize_171231233209


STEP 2

 EXFOLIATION

instasize_171231233350

Every makeup routine starts with cleansing and exfoliation, and the same applies to the lips. Begin by treating the pout to some much-required exfoliation ritual. A lip scrub helps you to get rid of the dead skin cells and allows the lipstick and lip liner to work in a smooth way on your lips.

Clean and exfoliate your lips with a dry, soft-bristled toothbrush or wet, warm washcloth. This will remove any dead and dry skin from your lips before you apply lipstick.


STEP 3

LIP PRIMER OR FOUNDATION

instasize_171231233415

Once you are done with the exfoliation, prime the pucker. The primer helps keep the lippie much longer. It helps enhance the permanence of your lip colour.

or

Foundations

Apply foundation to your lips as well as your face. Allow it to dry for a just a few seconds. You can even brush some face powder if you wish. This provides a base for putting on the lip liner and lipstick.


STEP 4

TRACE LIP LINE

Lip liners

After prepping your lips, its time to put your liner to work. Depending on the desired results, this step may take a few tires, especially if you are relatively new at liner. However, in selecting the right shade and the strategically apply your product, you can get that fuller finish you crave.

Close mouth, beginning at the “V” shape in your upper lips and just outside the natural lip line take a sharp lip liner pencil and use short strokes to follow the lip line to the corner of your month. Repeat on the other side of the upper lip. When you finish with the upper lip, start at the middle of the bottom lip, just inside the natural lip line, and move the outward corners as you did for the top lip.

Fill in the rest of the lips with lip liner. This step is mandatory, but it will make your lipstick last longer.


STEP 5

STAIN LIPS

instasize_171231233433

Apply a lips stain or powder before rubbing in the real lip colour, is a great way to get bullet proof lip. It also helps setting the lip look and keeping the colour in place, preventing colour bleeding.


STEP 6

APPLY LIPSTICK

Liquid lip stick

Use a lip brush to apply your lipstick, beginning with the center of your lips and brushing outward. The lip brush allows your lipstick to go on more evenly and gives you more control. You can also add a frosted shade to your upper lip to make your lips look even fuller.


STEP 7

CONCEAL YOUR LIPS

Neurtal concealer

After you apply lip stick to your lips, you need to conceal the fine lines around your lips. Many reason, cause these lines, the biggest culprit being, dry skin. While you need to start moisturizing your lips and skin around it for long term results, dab some concealer to buff away the lines for a quick solution !


STEP 8

PLAY UP THE PUCKER

Lip gloss

Just like you would creatively line your eyes, there area a variety of playful ways to enhance your lips. And whether you want  more juicy or dramatic results, you can use ready to grab tools like lip gloss or highlighter to totally help you out.

To enhance your lips even more, make artist Anne Marie DeMauro using makeup essentials like lip gloss, to feign that plumper appearance pronto.

“After applying your base colour, dab a small dot of shimmer gloss right in the center of the bottom lip, “says Anne Marie DeMauro. “This will visually round out the lip and create a plumper appearance as well as some glamorous pop of shine.”

Love that sultry lip that keeps him coming back for more ? To get that juicy appearance, creating an ombre effect can definitely create the irresistible impact.

“To make your lips look fuller with more shape use a darker colour on the outside and a slightly brighter in the middle of the lips,” adds Jamie Greenberg. “The illusion you want to portray is juicy lips.”


STEP 9

CLEAN UP

instasize_171231233325

Now that you have spent all this time doing your lips, you’ll definitely want your look to last. Grab a one-ply tissue (or just pull some two-ply toilet paper in half) or a blotting sheet and hold it over your lips. Pick up your translucent powder again and lightly and dust it over the tissue. This will really seal in your lipstick. Re-apply more lipstick with the lip brush if you want to increase the wear-time of your lipstick.

This is a good trick even if you’re not overdrawing your lips. BUT, don’t do it when you are wearing ultra-glossy lipstick, highlighter or lips gloss . It’ll just make a gooey mess.


TIPS

DO’S

Invest in a good lip brush. When you are first perfecting your lip lining skills, you’ll probably end up with more than a few wonky looking lines. A good lip brush can smudge those lines ever so slightly to create a more natural, even look.

Pay attention to your cupid bow. It can be tricky to properly line it (that little dip in the middle of your top lip). Rather than attempting to follow the lines of your cupid bows exactly, just draw an X. The X-shape will create the illusion of a strong cupid’s bow without looking overdone. If your X looks too sharp, grab your lip brush and blend.

Experiment with bright lip liner. Layer a cherry colour lip liner underneath our dusty rose lipstick to add a fresh life to it. Try a bubble gum pink shade of lip liner then cover it with some gloss for a vibrant glow.

Remember to line the coners of your lips. For a natural look, It’s important to cover every little spec of space on your lips. If you leave  the corners of your mouth unlined, you’ll end up with unnatural looking coverage or feathered lipsticks.


DON’TS

Don’t use straight lines. on your try, you will probably be tempted to just draw one straight line around your lip. Resist the urge ! Use a series of short lines. It is so much easier that way and i’ll create a much more natural effect. You don’t want it looking like you literally drew a circle around your month. The goal is to have your lip liner simply be invisible.

Overdraw your lips. I know this is a trend right now and i know that I just told you to overdraw around your cupid bow, but trust me here. You don’t want to over draw your lips. If you must overdraw your lips, wait until you’ve got a little more experience under your belt. Master the basic lining skills before you jump into anything more advance.

Don’t go too dark. If you can’t decide between two different shades of lip liner, always go for the lighter one. Dark colours are just too hard to work with and they look downright dreary on a lot of different skin tones.

Don’t forget about the corners of your mouth. Doing so causes a break in the natural flow and line in your lips.


CONCLUSION 

In this discussion, we have tried to describe how to choose the right lip colour, how to apply lipstick to thin or narrow lips and also do’s & don’ts tips.

Best of luck!!

**********************************

Thank you for stopping by, I’d be very grateful if you’d help to spread it by emailing it to a friend, or sharing it on Twitter or Facebook.

See you soon and have a holiday !

THANK YOU!!!


What are undertones ?

Bonjour / Hello !!

Welcome back to FLAWLESS BEAUTY BLOG BY NAKIBA. Thank you for stopping by. I hope you all had a good week and you’re fine.

What a past two weeks I had dwrcl, but mi deh ya same way…

Alors, this week’s topic is WHAT ARE UNDERTONES.

Understanding the real colour of your skin is primarily about discovering your skin’s undertone, which is the key to buying the right foundation shade and creating flawless makeup look. Choosing the right colours based around your hair colour, eye colour, and natural undertones will, after accentuate your natural features and make you glow.

WHAT IS SKIN’S UNDERTONE ?

instasize_170928100502

When shopping for foundation, you’ve probably heard the terms “cool,” warm,” or “neutral” to describe how a shade will look on the skin. Those terms refer to your skin’s undertone and are used to determine which foundation shade will match it the best.

“Undertone” is the term used for that subtle, more muted colour that lies underneath the skin. You can think of it as a “shadow” that is always there. While the surface colour may change, the undertone stays the same, regardless. It’s not about how light or how dark your skin is; people of all skin colour, form very fair to deep, can have cool, warm, or neutral undertones. Here’s what each of these terms means.

COOL

Hints of blush, pink, or a ruddy complexion.

WARM

Skin skews yellow, sallow,peachy, or golden.

NAUTRAL

Has no obvious overtones of pink or sallow skin, but rather the skin’s natural colour is more evident.

That means you should choose use your undetone to form the basic of your overall skin tone. In fact, most beauty expert recommend that you use your undertone, rather than your surface colour, to determine which foundation is best. A foundation that doesn’t match your undertone will often look “off”- either to orange, pink, red, or ashed. Even eye shadow and blush that doesn’t match your undertone will also look less attractive than colours that do match.

HOW TO DETERMINE YOUR SKIN’S UNDERTONE

There are several way to determine your skin’s undertone. One is, start by looking at the inside of your arm, where the underlying colour shows through fairly well. This area is naturally hidden form the sun and, therefore, is not sun damaged or discoloured, which is why skin in this area works best to reveal how warm, cool, or neutral your skin really is.

Answering the following question is aslo helpful:

Does your skin tan easily and rarely sunburn? If so, you probably lean toward a warm or neutral undertone. If not, there’s a good chance you will fall into the cool-tone category.

Do your veins appear bluish or more deep purple? If the answer is yes, you’re likely in the cool-undertone spectrum. If your vein appear greenish, you mostly likely skew towards the warm-toned. Those with neutral undertones will have difficulty discerning, either colour-it will just all look neutral. 


TIPS

Do you look better in silver or gold? Personal preferences aside cool undertones tend to be flattered by silver/platinum; those with warm undertones look better in gold-toned jewelry. Neutral skin tones look equally great in both (lucky you!).

Does your skin look somewhat ashen or gray? You might have the wild card of the bunch-olive skin– which is a combination of the natural neutral, slightly yellow undertone  everyone has plus the greenish ashen hue that’s unique to olive skin. Olive skin is very specific, but is not neutral as some tend to call it.


CONCLUSION

In this article, we have tried to describe to you what are undertone and how to fine out whether you have warm, cool, neutral or olive undertone.


If you enjoyed this post, I’d be very grateful if you’d help to spread it by emailing it to a friend, or sharing it on Twitter or Face book.

Stay tuned next Monday, I’ll post about “WHAT ARE MAKEUP BRUSHES ?

See you soon. Have a wonderful week!

THANK YOU!!!


What are eye brow colours?

Happy Monday FLAWLESS BEAUTIES, I hope you all are fine, I am making this post really short and straight to the point. I feel very tired and I am sick with the cold. I just drank lemon and honey tea. I hope it helps, it did the last time. Ughh…

Keep reading to find out what are eyebrow colours.

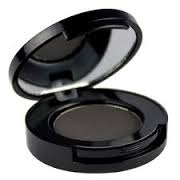
Eyebrow pencils or eye shadows are use to add colour and shape the eyebrows, usually after tweezing, shaving, threading or waxing. They can be used to darken the eyebrows, correct their shape, or fill in sparse area. Brow powders are similar to pressed eye shadows, and are applied to the brows with a brush. Brow powder cling to the eyebrow hairs, making the eyebrow appear darker and fuller.

The chemistry of eyebrow pencils is similar to that of eyeliner pencil. The chemical ingredients in eyebrow shadows are also similar to those in eye shadows.

When choosing a brow pencil, it’s not just about matching your hair colour. It’s also about your skin tone and eye colour.

“If your skin tone has pink in it, you don’t want to match exactly to your hair colour or else it will look orange. So you want to go for something a little ashy,” advises Madron.

“For brunettes, the general rule is to stay within one to two shades rages of your hair color. If you have light hair with light eyes, pick a darker tone to define. If you have dark eyes, it’s always safer to go slightly lighter,”   says Madron.

People with black hair seem to think they need to find an exact match, but that tends to look drawn-on and fake. Try a cool, medium-brown instead,” she Madron.

If you’re a blond, you don’t want to look mousy. If you have light skin and eyes, match to the base tone of your hair. This will provide get definition and, more importantly, make you look awake. If you match to the lightest part of your hair, you will look tired and washed-out.” She said.

If you’re albino, depending on the amount the person has, they may have very pale hair, skin and eyes, although some people with albinism can have brown or ginger hair. You can use a brown pencil or a brown shadow to colour in the eye, choose eye brow colour base on the the fairness of your skin and colour of your eyes. Stay within one or two colour shade range of your color. If you have white hair with light eyes, pick a darker tone to define. If you have dark eyes, it’s always safer to go slightly lighter.

TIPS

If you have a lot of brow hair, try to match the eyebrow colour as closely as possible. If you have sparse hair: dark haired people should go one or two shades lighter than the colour of hair on their head. For light haired people go two shades darker than the colour of hair on your head.

CONCLUSION 

In this discussion, we have tried to describe to you what are eyebrow colours and the best ones (s) to use base on your hair colour, eye colour and skin tone.

Rules are only “conversational wisdom” and this may not be best for you.

**********************************************

If you enjoyed this post, I’d be very grateful if you’d help to spread it by emailing it to a friend, or sharing it on Twitter or Face book.

Stay tuned next Monday I’ll post about “WHAT ARE CLEANSERS”!!!

See you soon.

Have a great week!

THANK YOU!!!


What are eyeliners?

Bonjour à tous / hello everyone, welcome back to FLAWLESS BEAUTY BLOG BY NAKIBA. How you’ll doing? Did you’ll have a great weekend? I’m fine and I had an amazing weekend. I went to the market on Saturday and bought myself and my mom some paella, ohh we love us some paella man. We enjoy eating this meal a lot. It’s one of the best thing about Saturday’s. This weekend the weather was good, such nice vibes and people. I’m happy I took a walk with my dad. We should do this more often, I will see to that. It should be fun !!!

.

Alors, read on to find out about gel eyeliners to pencil eyeliner, how and where to apply your eyeliner…

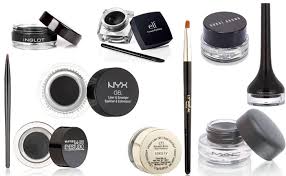
Eyeliner is a cosmetic used to outline and emphasize the eyes. It is applied around the contours or the eye(s) to create a variety of aesthetic effects. This cosmetic product is available in variety of colours, in pencil, liquid, pressed (cake), of felt tip pen form.

With eyeliner you can create a line on the eyelid close to the lashes to make the eyes appear larger and lashes fuller.

When choosing an eyeliner, there’s actually a lot of consider, there are just so any different types of eyeliners and the kind that you will choose will greatly affect the application process and the end results

EYELINERS

images.jpg

According to Wikipedia, eyeliner was first used in Ancient Egypt and Mesopotamia as a dark line around the eyes. As early as 10,000 BC, Egyptians and Mo wore various cosmetics including eyeliner, not only for aesthetics but to protect the skin from the desert sun. They produce eyeliner with a variety of materials, including copper ore and antimony.

Now in the twenty first century, eyeliner is commonly used in a daily makeup routine to the eyes to create the look of wider or smaller eyeEyeliner can be used as a tool to create various looks as well as highlighting different features of the eyes. Eyeliner can be drawn above upper lashes or below lower lashes or both, even on the waterline of your eyes. Eyeliners are available in a wide range of hues, from the common black, brown and grey to more adventurous shades such as bright primary colours, pastels, frosty silvers, gold’s, white and even glitter – flecked colours.


GEL EYELINERS

imgres.jpg

Gel eyeliners, which are softer than liquid eyeliner can be easily applied with an eyeliner brush, it may seem intimidating at first but it’s worth trying if you, tend to do a lot of cat eyes. Gel eyeliner can be precisely applied.

LIQUID EYELINERS

imgres.jpg

Liquid eyeliner is an opaque liquid that usually comes in a small bottle and is applied with a small brush with a sharp tip. It’s great for creating clean lines that swoop or flick. It’s for looks that require delicacy and preciseness, because liquid eyeliner gives a much heavier appearance, it is often only applied to the upper lash line, however nowadays it is used in all types of ways.

PENCIL EYELINERS

imgres.jpg

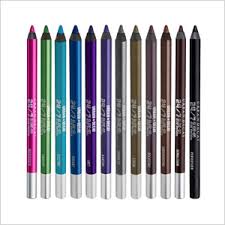
Pencil / kohl eyeliner is a soft powder available in dark matte shades. It is often used in black to outline the eyes. It comes in pencil, pressed powder, or loose powder form. This type of eyeliner is more likely to smudge.

There’s a lot to be said for the smoky eye look – and you can achieve that look with pencil eyeliner.

POWDER – BASE EYELINER

imgres.jpg

Powder – based eye pencils is eyeliner in wood pencil. It generally available in dark matter shades.

WAX – BASE PENCILS

imgres.jpg

Wax – based pencils are softer pencils and contain waxes that ease application. They come in a wide variety of intense colours as well as paler shades such as white or beige. Wax – based eyeliners can also come in a cone or a compact with a brush applicator.

STEP 1

Apply eye shadow.

It  is nesessary for you to apply eye shadow (s) first when creating an eye makeup look with eye shadow (s) and eyeliner.

STEP 2

Choose an eyeliner:

Liquid, pencil or gel. For liquid eyeliners: To ensure that the liquid liner is well-mixed, you will need to shake the liquid liner for a few seconds before applying.

STEP 3

Applying eyeliner

Use the eyeliner to create a dotted line starting from the middle then along your upper lashes. Then begin by appling eyeliner to connect the dots,  starting from the inner corner of your eyes to the outer corner of the eyes.

STEP 4

 Creating wing
Wings are optional, but adding wings can intensify your look. If you want to create a wing look, follow the curve of your outer lash line upwards from the outer corner of your eyelid. Then, fill the wing as needed.
* Try creating a small wing if you do not want to look dramatic, or go for a longer wing for a high drama look.

TIPS

Be extremely cautious when applying eyeliner. You must have a steady hand and be sure that you remain still. Apply to desired area with short strokes and gentle pressure; the most common placement is close to the lash line. For powder shadow liner application, scrape a small amount onto a tissue and apply to the eyes with a disposable applicator clean brush. If desired, wet the brush before the application for more dramatic look.

You can usea a tape to create wings by placing some tape on your lower lash line so that it is at an angle. The tape should be right up against the outer edge of your lower lash line extending upwards your eyebrow. You can tilt the tape as much or as little as you want, but keep in mind that the more tilt will look more dramatic. If you want less dramatic look reduce the amount of tilt in your tape.

NOTES: Eyeliner pencils consist of a wax (paraffin) or hardened oil base (petrolatum) with a variety of additives to create colour. They are available in both soft and hard for of use on the eyebrow as well as the upper and lower eyelid.

CONCULSION

In this discussion, we have tried to describe to you what are eyeliners. You also have an idea on how and where to apply eyeliners.

If you’re still not sure which colours to use to compliment your eye colour, have a look at my post for brown eyesgreen eyes, black eyes, grey eyes, red eyes, violet eyes, heterochormia and blue eyes.

RED EYES

https://beautyblogbynakiba.wordpress.com/2016/12/23/what-is-the-best-eye-makeup-colours-to-compliment-red-eyes/

BROWN EYES

https://beautyblogbynakiba.wordpress.com/2016/08/05/what-are-the-best-eye-make-up-colors-to-compliment-brown-eyes/

BLUE EYES

https://beautyblogbynakiba.wordpress.com/?s=blue+eyes

GREEN EYES

https://beautyblogbynakiba.wordpress.com/?s=green+eyes

VIOLET EYES

https://beautyblogbynakiba.wordpress.com/?s=VIOLET+EYES

GREY EYES

https://beautyblogbynakiba.wordpress.com/2016/12/30/what-is-the-best-eye-makeup-to-enhance-grey-eyes/

BLACK EYES

https://beautyblogbynakiba.wordpress.com/2016/12/30/what-is-the-best-eye-makeup-colour-to-compliment-black-eyes/

***************************************

If you enjoyed this post, I’d be very grateful if you’d help to spread it by emailing it to a friend, or sharing it on Twitter or Face book.

Stay tuned next Monday, I’ll post about “WHAT ARE FACE POWDERS”!!!

See you soon.

THANK YOU!!!


What are blushes / cheek colours?

Bonjour à tous / Hello everyone Welcome back to FLAWLESS BEAUTY BLOG BY NAKIBA, I hope you all had a great weekend. This week’s topic for MAKEUP MONDAYS IN THE MORNING is “WHAT ARE BLUSHES / CHEEK COLORS” Do you know how to apply blush / cheek color? Do you know where to apply blush / cheek color? If your answer (s) are NO. Don’t worry we are here to help !

Read on to find out how and where to apply your blush / cheek colour. 

Blush, also known as cheek colour or rough, is used primarily to add a natural-looking glow to the cheeks. Blush comes in powder, gel, and cream form.

images.jpg

The right shade of blush can warm up your complexion, create the illusion of cheekbones, and even make you look younger, blush are truly a magical makeup product.

STEP 1

Choose your blush

If you have fair skin, I suggest, look for a baby pink, peach or sheer plum; for medium complexion, choose an apricot, mauve, peach or soft berry; dark complexion choose raisin, brick bright tangerine; for olive complexion  orangey preach, rose or bronze.

STEP 2

Apply your foundation & concealer

Blush is added as a step after you apply your concealer and foundation. Put these in an even coat over the entirety of your face to smooth your complexion then apply face powder (apply to parts of the face you apply foundation) and your setting powder (apply to the parts of the face you apply concealer) to create a blank canvas for blush application. Be sure to blend the foundation down your neck slightly for a more natural look.

STEP 3

Swirl the brush evenly in the blush

It’s best apply your blush is in light, and build up colour rather than adding a single dark layer at once. Therefore, just lightly swirl the end of your brush on the powder, top off the access into the lid of the container.

STEP 4

Apply your blush

Apply blush with short strokes to the natural hollow of the cheek just under the cheekbone, apple of your cheek and to the area where natural colour would normally appear.

TOOL FOR THE JOB

Get a bronzer brush

Choose a blush brush with very good bristle for the best application.

2248516.JPG

STEP 5

Check blush application in daylight

Make sure your blush application is not too heavy and has an even appearance, watching for streaks, if too much blush is applied you can even you it out with a cotton pad or apply a little base powder.

TIPS

Be sure to take a step back from the mirror and make sure everything is even. Choose two separate blushes for when you’re at your lightest in winter, and for your tanned summer skin. This will keep your blush uniform year round.

CONCULSION

In this discussion, we have tried to describe to you what are blushes and tools to use. You also have an idea on how and where to apply blush.

If you enjoyed this post, I’d be very grateful if you’d help to spread it by emailing it to a friend, or sharing it on Twitter or Face book.

Stay tuned next Monday I’ll post about “WHAT ARE EYELINERS”!!!

See you soon.

THANK YOU!!!


How to define and reshape eyebrows for wide-set eyes?

Bonjour à tous / Hello everyone, Welcome back to Flawless Beauty Blog by Nakiba. I must say it has been a hell of a week, the good, the bad and the ugly. This calls for a little weekend fun in the city and lunch at KFC ! Enough of my boring excitement for just a walk in the city.

Read on to find out how to define and reshape eyebrows for wide-set eyes.

Defining and reshaping the eyebrow can be an art unto itself. Well groomed brows are a part of a complete and effective makeup application. The eyebrow is the frame for the eyes, and the shape and lenght affect the profile of your face.

If you want to properly groom eyebrow, begin by removing all unnecessary hairs, then use an eyebrow pencil, eyebrow gel or eyebrow powder to fill in the spaces.

BRING YOUR WIDE-SET EYES CLOSER TOGETHER

Wide-set eyes are defined as those with more than the lenght of one eye between them. You can balance your wide-set eyes by extending the eyebrow slightly inwards and outwards. A more rounded shape will enclose the eye and make the space seem shorter.

The most important steps to follow when shaping your eyebrow is to draw three lines.

STEP 1

Neatly organize your eyebrows in place with a eyebrow / mascara comb – brush.

TOOLS FOR THE JOB


wooden-eyelash-combo-brush-large_new_black_1.jpg

Mascara comb – brush: The mascara comb – brush is a double sided tool. It’s plastic comb is used to comb through eyelashes; it’s thick bristle brush is used to tame and brush the brows.

STEP 3


Comb your eyebrow hairs up wards with the brow brush, and starting from the ends to the front of your eyebrows, trim 0.2 mm of stray hair that extend past the upper brow line with a eyebrow brow shaping scissors. Next, brush down wards and cut the hairs beyond the upper brow line.

TOOLS FOR THE JOB

imgres.jpg

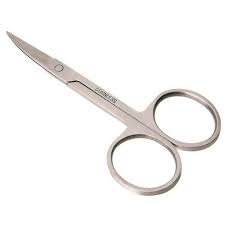
Brow shaping scissors: This easy-to -use pair of eyebrow scissors, effectively trims and grooms the eyebrow.

STEP 3

To remove excess hair, tweeze, shave, wax or thread.

TOOLS FOR THE JOB

eyebrow hair removal tools.jpg

STEP 4

The first line is vertical, from the inner corner of the eye upward.  Then just a few millimetres outwards, and clean up the space in-between them. This is where the eyebrow should begin.

first eyebrow.jpg

STEP 5 

The second line is vertical, from the outer circle of the iris of the eye upward. You should be looking straight ahead as you determine the line. This is where the highest part of the arch would ideally be.


second eyebrow .jpg

STEP 6 

The third line is drawn at an angle from the outer corner of the nose. This is from the outer corner of the nose to the outer corner of the eye. This is where the eyebrow should end.


third eyebrow .jpg

STEP 7

Fill in your eyebrow with lash-like feathery strokes where there are spaces, use an eyebrow pencil or an angle brush with eyebrow powder or gel.

TOOL & PRODUCTS FOR THE JOB

Collage eyebrow .jpg

TIP

For shorter eyebrow hair, trim off an additional 0.1 mm, starting from the ends to the front of your eyebrows.

CONCLUSION

In this discussion we have tired to describe to you how to define and reshape eyebrow for wide-set eyes and also ways in which you can remove hairs from the eyebrow.

Best of luck!!

****************************

I hope you found something useful among these tips! If you have any other tips to share, please leave a comment, as the discussion is likely to benefit many other wide –set eyes beauties looking to reshape and define their eyebrow.

I’d be very grateful if you’d help to spread it by emailing it to a friend, or sharing it on Twitter or Facebook.

Stay tuned next Friday, I’ll post about “HOW TO DEFINE AND RESHAPE EYEBROWS FOR ROUND FACE“!!!

See you soon.

THANK YOU!!!

How to define and reshape eyebrows for closet-set eyes?

Bonjour à tous / Hello everyone, welcome back to FLAWLESS BEAUTY BLOG BY NAKIBA. I hope you all are fine and you had a wonderful week. I’m great but I’m very tired, I can’t wait to sleep. CHEERS TO THE FREAKING WEEKEND !!! I had an amazing week besides having the flu. Super happy I’m recovering well. You all stay warm, dry and safe now.

Read on to find out how to define and reshape eyebrows for closet-set eyes.

Eyebrows are a major facial feature and for many women “eyebrow shaping” is the most challenging aspect of makeup. The look of the eyebrows changes the impression of the face and can deeply affect the overall facial balance.

CREATE DISTANCE FOR WIDER LOOKING YOUR EYES

The thing about eyebrow shapes to keep in mind is that we are usually born with the best eyebrow shape for our face. Most of the time, all you have to do is trim and shape them.

The key alteration to your eyebrow is to extend your eyebrow just a few millimetres outwards, and clean up the space in-between them. Go for a long, wide arch and let your eyebrow sit over the entire brow bone. Ensure that the inner ends of your eyebrows are still aligned with crease of your nostrils.

The most important step to follow when reshaping your eyebrow is to draw three lines.

STEP 1

Neatly organize your eyebrows in place with a eyebrow / mascara comb-brush.

TOOLS FOR THE JOB

wooden-eyelash-combo-brush-large_new_black_1.jpg

Mascara comb – brush: The mascara comb – bush is a double sided tool. It’s plastic comb is used to brush through eyelashes; it’s thick bristle brush is used to tame and shape brows.

STEP 2

Comb your eyebrow hairs up wards with the brow brush, and starting from the ends to the front of your eyebrows, trim 0.2 mm of stray hair that extend past the upper brow line with a eyebrow brow shaping scissors. Next, brush down wards and cut the hairs beyond the upper brow line.

TOOLS FOR THE JOB

imgres.jpg

Brow shaping scissors: This easy-to -use pair of eyebrow scissors, effectively trims and grooms the eyebrow.

STEP 3

To remove excess hair, tweeze, shave, wax or thread.

TOOLS FOR THE JOB

eyebrow hair removal tools.jpg

STEP 4

The first line is vertical from the point just above the inner corner of the eye. This is where the eyebrow should begin.

first eyebrow.jpg

STEP 5

The second line is drawn at an angle from the outer corner of the nose. This is from the outer corner of the nose to the outer corner of the eye, extending this line just a few millimetres outwards. This is where the eyebrow should end.

second eyebrow .jpg

STEP 6

The third line is vertical, from the outer circle of the iris, of the eye upward, arch the brow a bit further outside to create the illusion of space between the eyes. You should be looking straight ahead as you determine this line. This is where the highest part of the arch would ideally be.

third eyebrow .jpg

STEP 7

Fill in your eyebrow with lash-like feathery strokes where there are spaces, use an eyebrow pencil or an angle brush with eyebrow powder or gel.

TOOL & PRODUCTS FOR THE JOB

Collage eyebrow .jpg

TIP

For shorter eyebrow hair, trim off an additional 0.1 mm, starting from the ends to the front of your eyebrows.

CONCLUSION

In this discussion we have tired to describe to you how to define and reshape eyebrow for closet-set eyes and also ways in which you can remove hairs from the eyebrow.

Best of luck!!

**********************

I hope you found something useful among these tips! If you have any other tips to share, please leave a comment, as the discussion is likely to benefit many other close –set eye beauties looking to reshape and define their eyebrows.

If you enjoyed this post, I’d be very grateful if you’d help to spread it by emailing it to a friend, or sharing it on Twitter or Face book.

Stay tuned next week’s topic is ‘HOW TO DEFINE AND RESHAPE EYEBROW FOR WIDE-SET EYES’

See you soon.

THANK YOU!


What is my eye shape?

Bonjour à tous / hello everyone, Happy New Year!!! I wish you all good health, love, peace, faith and courage. Welcome come back to FLAWLESSS BEAUTY BLOG  BY NAKIBA, I hope you all had a great holiday. Let’s continue, if you are still not sure what are your eye’s shape.

Read on to find out what is your eye shape

It’s actually fairly easy to determine your eye shape as long as you have a mirror and a few spare minutes. Aside from eye shape, you may also want to pay attention to the position of your eyes on your face, since this can affect the overall appearance of your eyes just as much.

STEP 1

Look at your eyes in a mirror.

Go to a well-lit location with a mirror. Bring the mirror as close to you as possible so that you have a clear view of at least one of your eyes.

STEP 2 

Ask yourself if your eyelid has a crease.

Look at your upper eyelid. If this eyelid does not have a crease, you have “mono-lid” eyes. On the other hand, if your eyelid does have a crease, you will need to continue on before you can identify your eye shape.

Note: that the eyelid crease does not need to be visible to be counted. True “mono-lideyes completely lack a crease.

The “mono-lid” counts as a basic eye shape, so if you have one, you do not need to progress through the remaining steps in the “Shape” section of this article. You can, however, move onto the “Position” section.

You can have a look at my post for mono-lid on how to apply eye makeup. [LINK BELOW]

https://beautyblogbynakiba.wordpress.com/2016/11/04/how-to-appply-eye-makeup-to-enhance-monolid-eyes/

imgres.jpg

STEP 3

Note the position of the outer corners.

Imagine that there is a straight, horizontal line extending through the centers of both eyes. Ask yourself if the outer corners of your eyes lie above or below this center line. If the corners are above this line, you have “upturnedeyes. Similarly, if the corners are below this line, you have “downturnedeyes.

Imagining a center line might be difficult, so if necessary, you can place a disposable coffee stirrer or thin pencil across the horizontal center of one eye. Use your unblocked eye to examine the outer corner position of your blocked eye.

If the outer corners of your eyes fall near the center line, you will need to progress further to identify your basic eye shape.

If you have “upturned” or “downturnedeyes, you can stop sorting through the steps of the “Shape” section and move onto the “Position” section.

You can have a look at my post for upturned and downturned eyes on how to apply eye makeup [LINK BELOW]


https://beautyblogbynakiba.wordpress.com/2016/12/02/how-to-apply-eye-makeup-to-enhance-upturned-eyes/

static1.squarespace.jpg

STEP 4

Take a closer look at the crease in your eyelid. 

 With your eyes wide open, ask yourself if the crease of your eyelid is visible or hidden. If the crease is hidden underneath the upper part of your lid or your brow bone, you have a “hoodedeye shape.

Stop here if you have identified your eye shape as “hooded.” This is your basic eye shape, so you can skip the rest of the steps in this section and move onto the “Position” section of the article.

If the crease of your eyelid is visible, you will need to progress through the last part of this section.

You can have a look at my post for hooded eyes on how to apply eye makeup [LINK BELOW]


https://beautyblogbynakiba.wordpress.com/2016/10/21/how-to-apply-eye-makeup-to-enhance-hooded-eyes/

Close-Set-Eyes-Jeniffer-Aniston.jpg

STEP 5

Examine the whites of your eyes.

More specifically, look at the whites around the iris—the coloured portion of the eye. If you can see any white around the top or bottom of your iris, you have “roundeyes. If you cannot see any white above or below the iris, you have “almondeyes.

Both “round” and “almondeyes are basic eye shapes.

If you have no other identifiable shape features, as indicated by the previous steps in this section, your eye shape can only be “round” or “almond.”

This is the last quality you can take into consideration when identifying eye shape. The only other thing to take into consideration after this is the position of your eyes on your face.

You can have a look at my post for round and almond eyes on how to apply eye makeup [LINKS BELOW]

ROUND SET EYES LINK

https://beautyblogbynakiba.wordpress.com/2016/10/07/how-to-apply-eye-makeup-the-enhance-round-eyes/

imgres.jpg

ALMOND EYES LINK 

How to apply eye makeup to enhance almond shaped eyes?

imgres.jpg

STEP 6

Look into your mirror again.

Just as you did when you identified your eye shape, you need to look at your eyes closely using a mirror while in a well-lit location. Unlike before, however, you should make sure that both eyes are visible in the mirror. One eye will not be enough to accurately determine eye position.

STEP 7 

Consider the depth of your eyes.

Take depth into consideration when determining the position of your eyes, because you could have either deep set eyes or protruding eyes.

Deep set eyes appear as though they are tucked further back into the socket, causing the upper eyelid to appear short and small.

Protruding eyes, on the other hand, literally bulge outward from the socket and toward the upper lash line.

Since this step only identifies eye depth, you will still need to continue with the remaining step of this section to determine eye size.

STEP 8 

Examine the inside corners of your eyes.


More precisely, examine the gap lying in between the inside corners of both eyes. If this gap is less than one eye length in size, you have close set eyes. If this gap is larger than one eye length, you have wide set eyes.

There is also the possibility that this gap is roughly the length of one eyeball. In this case, gap length is inconsequential and does not need to be taken into consideration.

This step only identifies your eye width. It does not influence  or size, so you will still need to move onto the remaining steps in this section even if you have wide or close set eyes.


STEP 9

Compare your eyes with the rest of your face.

Compare your eyes with your mouth and nose. Average eye size will be similar to that of your mouth or nose, if not a little smaller. If your eyes are significantly smaller, though, you have small eyes. If they are larger than your other features, you have large eyes.

As with depth, most people will not need to pay attention to the size of their eyes.

Take width into consideration.

If you have notably wide or close set eyes, you may want to consider that quality, as well, when you are apply eye makeup.

You can have a look at my post for wide and close set eyes in the links below

WIDE SET EYES LINK

https://beautyblogbynakiba.wordpress.com/2016/09/30/how-to-apply-eye-makeup-to-enhance-wide-set-eyes/

Kate Moss-1401979.jpg

CLOSE SET EYES LINK

https://beautyblogbynakiba.wordpress.com/2016/09/23/how-to-apply-eye-makeup-to-enhance-close-set-eyes/

embedded_miley_cyrus_close_set_eyes.jpg

Consider eye depth, as well. 

Eye depth does not necessarily play a huge role in the application of makeup, but there are a few things worth considering.

Do you have protruding, bulging or deep set shape eyes?

You can have a look at my previous post for deep set eyes, protruding and bulging eyes in the links below

DEEP SET EYES LINK


https://beautyblogbynakiba.wordpress.com/2016/10/28/how-to-apply-aye-make-up-to-enhance-deep-set-eyes/


Deep-Set-Eyes-–-Eyeshadow-Eyeliner-and-Eye-Makeup-Tips-for-Deep-Set-Eye-Types-Looks-for-deep-set-eyes.jpg 

PROTRUDING AND BULGING EYES LINK


https://beautyblogbynakiba.wordpress.com/2016/10/14/how-to-apply-eye-makeup-to-enhance-protruding-or-bulging-eyes/

imgres.jpg


NOTE: PECULIARTIES INVOLVED WITH SMALL OR LARGE EYES.


The amount of eye makeup you should use may vary if your eyes are sized outside of the traditional norm.

You can have a look at my post for small and large eyes on how to apply eye makeup [LINKS BELOW] 

https://beautyblogbynakiba.wordpress.com/2016/11/11/how-to-apply-eye-makeup-to-enhance-small-eyes/

taylor-swift-small-eyes.jpg


PROTRUDING AND BULGING EYES LINK


https://beautyblogbynakiba.wordpress.com/2016/10/14/how-to-apply-eye-makeup-to-enhance-protruding-or-bulging-eyes/


If you’re still not sure which colours compliments your eye colour, have a look at my post for brown eyesgreen eyes and blue eyes.

If you’re still not sure which colours to use to compliment your eye colour, have a look at my post for brown eyes, green eyes and blue eyes. [LINKS BELOW]

What are the best eye makeup colours to compliment brown eyes?  [LINK BELOW]

What is the best eye make up colors to compliment blue eyes?

What are the best eye makeup colours to compliment green eyes? [LINK BELOW]

What is the best eye makeup colors to compliment green eyes?

What are the best eye makeup colours to compliment green eyes? [LINK BELOW]

What is the best eye make up colors to compliment blue eyes?


I’d be very grateful if you’d help to spread it by emailing it to a friend, or sharing it on Twitter or Face book.

Stay tuned next week’s topic is ‘HOW TO DEFINE AND RESHAPE EYEBROWS FOR CLOSE-SET EYES!!!

See you soon.

THANK YOU!!!


What are the best eye makeup colours to enhance grey eyes?

Hey Flawless Beauties, welcome back, welcome back! I hope you all are having an amazing holiday season.

Today I’m changing things up a little, and adding a little spice to end the year and start fresh. I decided to cover the three following topics (grey eyes, black eyes, and heterochromia).  

My posting schedule didn’t go exactly as planned but I came across some good information and I was so excited to share them with you. I have completely changed everything around and I’m honestly happy about the way that turned out. If you have been with me on this journey, you must have noticed that my goal is to share as must as I know to help anyone who struggling with applying makeup. I think we all have been there not being quite sure what we were doing, but we just knew that we wanted our face beat. Let’s do it the right way, by enhancing our features. Everyone is different and what works for someone might not necessarly work for someone else. 

This is my first post of the day stay tune as the others will follow. Read on to find out about the eye makeup colours that compliment grey eyes.

Grey eyes may be one of the rarest eye colours, but the possibilities of playing them up with makeup are endless.

Grey eyes are like hazel in the blue family”, says Sephora Pro makeup artist, Amy Suchma. “They are usually a combination of grey green and a small amount of yellow around the pupil”.

When determining the best shades to enhance grey eyes, Suchma references basic colour theory principles. Orange, red or violet tones will make grey eyes appear more blue, green or light grey.


PLAY UP YOUR GREY EYES

Choosing the right eye makeup for grey eyes can really enhance your eyes, whether they are rich shade of inky grey or a light grey-blue.

Like all eye colours, there is no singular grey that encompasses all hues. Just like green, blue and brown, there is a wide range of shade in grey eye colours. While grey-blue eyes are one of the more common grey eye colours, there are also pale greys, green-grey, dark-grey, and hazel-grey. Although grey eye colours are not as prevalent as brown, there are certainly many eye makeup colours that can work wonderfully.

FOR BLUE-GREY EYES

grey blue eyes.jpg

Since orange is the colour opposite blue on the colour wheel, it is a great eye shadow colour for blue and grey-blue eyes to really play up the blue. Suchma suggests applying eye shadows with an orange tone, including neutral brown, copper, peach, salmon, melon or even bright orange. This will help the flecks of blue in your grey eyes to stand out. Wearing these shades with a touch of a light blue shimmer on the inner corner of your eyes will also bring attention to already existing blue, according to Suchma. For a softer and more natural look, opt for a coral shimmer instead of blue.

FOR GREEN-GREY EYES

imgres.jpg

Although the contrast colour for green is red, this colour doesn’t always work well for grey eyes and can make them look irritated. Instead, choose colours such as red-brown, wine, maroon, plum or purple. “The contrast of the red and violet tones with the green (and yellow) in the iris will make the green stand out”, says Suchma. To add definition and make grey eyes colour pop, draw on chocolate brown eyeliner along the waterline instead of black.

FOR BROWN AND HAZEL-TONED GREY EYES

BROWN AND HAZEL-TONED GREY EYES.jpg

If your grey eyes have a hazel, tan, or brown undertone, turn to eyes shadows that compliment brown eyes. Purple shades, for example, will compliment your eye colour well. Brown shades like chocolate, mocha, and tan will also enhance this eye colour.

LIGHT GREY EYES

BrightBlueEyes.JPG

Stick to what Suchma calls “grey-scale” tones such as silver, grey, charcoal or black. Grey eye makeup can work for grey eyes in two different ways. By applying a lighter shade of grey eye shadow or eyeliner will make the grey colour of your eyes appear darker. Conversely, applying a darker grey shade will make your eye colour appear lighter.

EYELINER

Grey eyes will look amazing with a pearly shade of eyeliner that emphasizes their rare smoky colour. Try metallic silver eyeliner for a creative party look. Pale pink, light teal or shimmery purple could be combined with silver eyeliner for a spectacular effect.

Blue, grey and silver-grey eyeliners will also be very useful for those who want to stress the colour of your eyes.

MASCARA

For mascaras a black one is a universal rule that everyone looks good in black mascara. Even on the fairest skin. It provides a dramatic frame for the eyes. For darker skinned tones, it adds drama to fringe. For your eye colour, you can also use mascara that blends in more with the blonde hairs of your eyelashes so it looks close to natural. I suggestions, you use colours like taupebrown and golden blonde.

TIPS

Black and silver eye makeup colours are another great choice for grey eyes. Different shades of grey, platinum, violet, ivory, gold and copper work harmoniously with one another. An interesting contrasting effect is given off by raspberry and orange-rich and succulent; they reinforce the natural eye colour so that it becomes the dominant feature.

A black smoky eye can really make the eyes stand out, especially if you have pale grey eyes. Use silver shadows as a highlighter to add a touch of extra sparkle.

For a sophisticated look

You can also apply several different shades of grey eye shadow. Apply a medium grey shade (at least one or two shades different than your eye color) as your base; use a dark grey for your contour color, and a light grey for your highlight shade. This method of using nearly monochromatic color creates a sophisticated and elegant look that draws subtle attention to the eyes.

Stay away from some shades of pink and red (particularly bright, bold shades) can make the eyes look teary or inflamed, so be careful using these colours. Another eye makeup colour to avoid is a grey that matches or is extremely close to your eye colours. This won’t bring out the natural beauty of your eyes the way many other colours.

Blue and green are also not suitable as they pull the focus to themselves.

Grey-blue eyes can change colour over period of time. Therefore, before doing your makeup, it is necessary to determine what your goals are and what you would really like to emphasise in your image.

Have fun and be creative, mixing and matching colours to suit your personality, what you are wearing or the event or situation for which you are dressing up.

Try different types of eye shadows like powders, minerals, cream, gels and pencils to determine which one works best for you.

Mix and match more than one colour of eye shadows or multiple shades within the colour spectrum in a rainbow or ombre effect for an over- the – top eye look.

NOTE: Before you pick any of these eye makeup colours, just remember no matter what always take your skin tone into consideration. After all, you don’t want to get something that is listed here and it doesn’t work with your skin tone! I’ll help you guys out by choosing the best eye makeup colour for your skin tone in an upcoming post.

HELLO, GREY EYES!!!!

CONCULSION

In this discussion, we have tried to describe to you grey eye colour. You also, got tips, an idea on which eye makeup colour to use to compliment grey eyes.

******************************

Go try out these tips right now.

Come back on my blog and tell me about the before-and-after. I bet you’ll have something to say!

If you enjoyed this post, I’d be very grateful if you’d help to spread it by emailing it to a friend, or sharing it on Twitter or Face book.

Stay tuned next Friday, I’ll post about ‘HOW TO DETERMINE YOUR EYE COLOUR!!!

HAVE A HAPPY HOLIDAY!!!

See you soon.


What are the best eye makeup colours to compliment red eyes?

Bonjour  / Good afternoon flawless beauties. Welcome back to FLAWLESS BEAUTY BLOG by NAKIBA. I hope you all are having a wonderful holiday so far, I’m sending the warmest Christmas wishes to you and your family. May God shower His choicest blessings, happiness and harmony among you and your household and extended family and friends.

Read on to find out about the eye makeup colours that compliment red eyes.

Red? Yes! Red eyes do exist, although they may often look pink. They are the most rare eye colour found in humans without any argument. A human or an animal that has severe forms of albinism, have this colour eyes.

The word “albinism” refers to a group of inherited conditions. People with albinism have little or no pigment in their eyes, skin, or hair. They have inherited altered genes  that do not make the usual amount of a pigment called melanin. Albinism in human is a congenital disorder characterized by the complete or partial absence of pigment in the skin, hair and eyes. Albinism results from inheritance of recessive gene passed from both parents or from only one parent and known to affect all vertebrates, including human.  It is due to the absence or defect of tyrosinase, a copper – containing enzyme involved in the production of melanin. Albinism is opposite of melanism.

 The eye may appear red under certain lighting conditions owing to the extremely low quantities of melanin, allowing the blood vessels to show through. The red you see in pictures is a reflection of the flash off the back of the eye, which is filled with blood vessels.

There are two different types of albinism: a partial lack of the melanin is known as hypomelanism, or hypomelanosis, and the total absence of melanin is known as amelanism or amelanosis. Albinism affects people of all ethnic backgrounds; its frequency worldwide is estimated to be approximately 1 in 17,000.

A common myth is that people with albinism only have red eyes. In fact there are different types of albinism and the amount of pigment in the eyes varies. Although some individuals with albinism have pinkish or violet eyes; some have hazel or brown eyes.

ENHANCE YOUR EYE’S BEAUTY

To compliment this eye colour, I recommend celery or medium green as well as grey eye shadows, your red eyes will also look great with neutrals like cream, ecru and various shades of grey. Alternative matching includes metallic colours like gold, silver or rose gold.

EYELINER

Accent your eye shadow (s) with similar tones of green, dark grey and charcoal eyeliners.

You can also use neutral and black eyerliner. Black eyeliner, will definitely add drama to the eyes.

MASCARA

For mascaras a black one is a universal rule that everyone looks good in black mascara. Even on the fairest skin. It provides a dramatic frame for the eyes. For darker skinned tones, it adds drama to fringe. For your eye colour, you can also use a mascara that blends in more with the blonde hairs of your eyelashes so it looks close to natural. I suggestions, you use colours like taupe, brown and golden blonde.

TIPS

Have fun and be creative, mixing and matching colours to suit your personality, what you are wearing or the event or situation for which you are dressing up.

Try different types of eye shadows like powders, minerals, cream, gels and pencils to determine which one works best for you.

Mix and match more than one colour of eye shadows or multiple shades within the colour spectrum in a rainbow or ombre effect for an over- the – top eye look.

NOTE: The use of makeup restricted, has to be proper and hypoallergenic makeup. Careful use of makeup!!  

HELLO, RED EYES!!!!

CONCULSION

In this discussion, we have tried to describe to you what causes red eye colour. You also, got tips, an idea on which eye makeup colour to use to compliment red eyes.

******************************

Go try out these tips right now.

Come back on my blog and tell me about the before-and-after. I bet you’ll have something to say!

If you enjoyed this post, I’d be very grateful if you’d help to spread it by emailing it to a friend, or sharing it on Twitter or Face book.

Stay tuned next Friday, I’ll post about ‘WHAT IS THE BEST EYE MAKEUP COLOURS TO COMPLIMENT GREY, BLACK, HETEROCHROMIA EYES’!!!

HAVE A HAPPY HOLIDAY!!!

See you soon.